Search This Blog

Wednesday, March 31, 2010

Why Is It Smart To Hire A Maid Service?


Why Is It Smart To Hire A Maid Service?

In our time and need of help around the home, we've turned to the growing industry of Maid Services. They provide us with all the needed aid and support we need to make our lives much easier with their cleaning services to turn our homes into clean havens once more. In San Diego North County, we turn to these maids  for help because we hardly have time of our own to handle our household while we are away from the home, being breadwinners for our families. What are the benefits maid services offer us as people too busy to be home to cater to the weeklong mess we probably left behind are these simple services that give us a piece of mind:


The main benefit these maids in North County give us is a cleaner home. They go through our household with the latest in cleaning equipment as well as the safest cleaning agents (being eco-friendly products) that don't leave behind strong chemical antiseptic smells after being applied, these chemicals are also safer for our children and pets since most conventional cleaning products such as Sodium Hydrochloride is trans-dermal- meaning they can enter the body through the skin and swim in the bloodstream, causing poisoning. The power of Maid Services' cleaning equipment also gives your house a more guaranteed cleanliness since they can eliminate nasty stains no ordinary carpet scrubbing or washing can handle. The maids in San Diego North County are trained professionals in the cleaning methods and procedures it takes to turn our homes into sparkling abodes devoid of dirt, they vacuum our floors with special vacuum cleaners that suck up any dirt from carpets, the also clean our windows; both inside and out as well as organize our house in such ways as folding our clothes, laundering our messy clothing, changing our bed sheets, etc. - It's practically full service.


The other benefits that maid services provide are their timing and availability. On the days we cannot clean our homes, they are always ready. Should it be a weekend or hectic weekday, Maid Services are available to us at anytime during the day and night. It's the whole point of being a maid service, to always be ready to serve. They provide us service packages that can vary in prices but with every package set up to have those above our budget range and those right on it- making it convenient for us to choose which one we want or could afford. There are additional services Maid Services provide as well like Pet Grooming and Cooking that goes beyond their normal cleaning service, these are always available to us at any time. Time is of no problem when it comes to calling on Maid Services.


The maids in San Diego North County also provide a function to us that are not quite obvious until you've understood the mechanics of how burglary works, putting their use and timing of maid service at such a crucial moment of safety for your home. Burglars often stalk and "case" the places they wish to hit and they do this by watching our homes for long periods could be weeks and take down noted patterns out neighborhood has to set up the right time to strike our homes. With Maid Services, we can ruin their careful planning and even discourage them to try as we can call in the maids in San Diego North County to clean our homes while we aren't in it, making it a perfect time to clean the house while any burglars plan to break-in is thwarted by the presence of the maids. Though not directly in aid to our home protection, Maid Services still affect the possible outcome if we did not call on them.
All these benefits are part of what we get when we hire a maid service to our advantage. The costs and effect of calling on one seemingly outweighs the doubts we have of availing the maids in San Diego North County help any time we need them.

Live In Maids For Hire – Making The Smart Choice

Live in maids for hire are common these days; however, before you decide on getting maid services, you have to understand many things first. You must be aware that the maid you hire is not a member of your family, and so it is of utmost importance that you choose carefully the one you will entrust your home to. Since the whole family will benefit from maid services, getting a maid should be a family decision.

Why should you hire maid services to begin with? There can be plenty of reasons like you need someone to care for your parent, to tend to your children, or to keep the house in order while you are at work. Whatever your reasons may be, you cannot deny the value of maid services.


Since you will be entrusting your home and your family to a stranger in this case, you need to be very cautious when looking for a maid. There are reliable agencies that deal with live-in maid services that you can approach. As much as possible, be specific with your requirements. Verify references and make sure that the maid has gone through proper profile or background checks.


You can have plenty of choices of live in maids for hire, but you can narrow them down based on your own feelings towards the maid, the skills you want your maid to be equipped with, her civil status and age.


Aside from these, you may prefer your maid to have a good experience with her previous employers or vice versa. She should be someone who can strictly adhere to the rules you set, and be always prepared to exhaust her skills and knowledge if needed. Before getting maid services, see to it that the salary, benefits, as well as bonuses and vacation leave credits are discussed well with the agency.


It certainly is no joke to get the services of a maid. So when looking for live in maids for hire, do a thorough research first and consider all possible options. This should guarantee that you will be taking in someone you can rely a hundred percent.

For more information, please visit our website:

http://www.dutchtouchmaids.com/


Tuesday, March 30, 2010

Painting tips and techniques

Tips and Techniques for a Great Paint Job
A room looks wonderful with a fresh coat of paint. But if you have a "Love-Hate" relationship with painting, you'll want to read our tips on getting a great finished product. You might even enjoy the project as much as the finished product!


Start Out Right
You'll enjoy the job more if you get everything together at the start. Organize a tool station in the middle of the area you'll be working in. Gather together your paint, brushes, rollers, hammers, screwdrivers, plastic bags, plastic wrap, rags, paint can opener, and drop cloths.


Plan a Day for Prep
Don't try to get everything done in one day. Use the day before painting day to gather furniture in the center of the room, patch cracks and holes, put blue painter's tape around doors and windows, and cover wall and ceiling light fixtures (light bulbs removed, of course!) with large plastic bags.


Clear the Decks
If you can, clear out all the furniture and accessories. Take everything off the walls. If you can't move everything out, place the furniture and lamps in the middle of the room and cover them with a good drop cloth. Be sure that you tape the cloth around the furniture. Then put a second cover of plastic or old sheet over everything.

Remove All Hardware

It may seem easier to paint around door knobs or cabinet hinges, but unless you're a professional, very experienced painter, you're bound to get drips around. So carry around some zip top bags and remove all cabinet knobs and hinges, door knobs, light switch plates and outlet covers, and light fixtures. Place the pieces together in separate bags and clearly mark the contents and location (top left cabinet, bathroom door, etc) you took them from. This is a great time to clean the hardware! Put them back when you're done painting.


Get Yourself Ready
No matter how hard you try, you're bound to get drips (or more) of paint on whatever you're wearing. So take off all jewelry. Reserve some old, but comfortable, clothes for your painting jobs. Slip-on shoes are easy to take off if you need to leave the room. You won't have to worry about tracking drops of paint into other rooms. When you paint the ceiling, put a scarf, shower cap, or old baseball hat over your hair and some plastic over your eyeglasses.


Don't Paint Over Problem Walls
If your walls have holes or cracks, fix them before you start with the paint. Any home center or paint store has knowledgeable personnel to guide you to the best products for the job. Wide cracks and large holes can be "bridged" with fiberglass tape, spackle will fill small holes and cracks, and texturizing products are available to match your existing wall finish.


Use the Right Painting Supplies for the Best Results
Rollers, Pads, Brushes, Painter's Tape, and Paints

Every year, new products come on the market to help make painting more enjoyable. You'll want to select the best ones for your job.


Natural or Synthetic Brushes


Paint brushes with natural bristles are meant for oil-based paints. Natural bristles will soak up the water and go limp in water-based paints. The newer synthetic bristles were designed for water-based or latex paints, but can be used for anything. Densely packed bristles that taper to a chisel edge help with painting a straight edge, cutting in or tipping. Split ends or “flags” hold more paint and spread it more evenly and smoothly. Choose the right brush for your job.


Foam Brushes and Rollers
Foam brushes come in many widths, are inexpensive, and are great for small jobs or touch-ups. Foam paint rollers work well, don't spatter the paint, and are easy to use when you want a really smooth wall. Don't try them on rough surfaces, though, as they will not hold up.


Pad Painters
Smooth pad painters offer simple and neat paint application and easy clean ups. Don't apply too much paint to the pad, as it will drip. You'll have to take it apart, clean it, dry it thoroughly, and start over.


Paint Rollers
A paint roller with a plastic core will last longer than one with a cardboard core. Select a roller "nap" (fullness of the covering) according to the texture on your walls. Use a flat, smooth roller for flat, smooth walls and a thicker, more plush roller for rough textured walls.


Water-Based or Latex Paint
New latex paints are formulated to be environmentally-friendly. Drying time is short (usually about 1 hour) and clean ups are easy with water. Apply water-based paints with rollers, pads, or synthetic bristle brushes. Latex paints tend to get a "skin" of paint in the can when they begin to dry out, so keep the can covered as much as possible. Pour paint into another container to work from and close the can.


Oil-Based Paint
Most professional painters prefer oil-based paints, especially for cabinets, furniture, and trim. New formulations do not harm the environment and are not toxic. Because they dry more slowly, oil-based paints allow for better coverage and work well in warm, dry climates where water-based paints would dry too fast. Apply oil-based paints with pads, rollers, or natural bristle brushes. Clean up with paint thinner or other solvent.


Drop Cloths

The best material for a drop cloth is a heavy canvas cloth. It's not as slippery as plastic and covers better than newspaper. Fold the cloth to fit any size room and tape down the corners to prevent paint from oozing over the edge. To prevent scratching, be sure to vacuum hardwood floors before you put the drop cloth down.


Tinted Primer
Most paint jobs work better when you use a primer or base coat. Have the primer or base paint tinted to match your surface paint color. You may be able to avoid a second coat of finish paint. For ceilings, try paint that is specially formulated for ceilings. Some brands go on light blue and change to white when dry. This makes it easier to see where you've already painted.


Painter's Blue Tape

If you've never used painter's blue tape, why not? It has a waxy coating to keep paint from seeping through, is available in several widths, and provides a perfect straight edge for painting. It will not pull up the paint on the surface it's stuck to, and the seal is activated when you put it down onto a smooth surface. Its special properties don't last forever, so don't leave it on the wall more than a couple of days.

Even if you've done a great job, some clean up will be required. You'll have to do some touch ups and put things away. Read some simple tips to wrap up your painting project in style.


Keep Your Brush Ready
You won't want to clean your paint brush or roller every time you need to take a break. Wrap them in plastic wrap and seal them in a plastic bag. They'll be ready and flexible when you return from your break. For longer storage (as much as a week), put the plastic bag with brushes in the freezer-- yes, the freezer! Thaw out the brushes for an hour before you use them again.


Have Plenty of Rags for Wipe Ups
No painter would be without a supply of rags. You'll undoubtedly need to wipe off excess paint, catch drips, clean up spills, or wipe off your hands.


Razor Blades
Scrape excess paint or drips from windows, tile, or glass with straight razor blades. The drips won't smear, and the surface will be perfectly clean.


Simple Clean Up for Latex Paint

When you're done painting, take time to soak your brushes or rollers with latex paint in a solution of water and laundry fabric softener for about 10 minutes. Swish them around in the water, remove them, and rinse well with clear water. Wipe or roll off excess moisture, then air dry the brushes and rollers before putting away.


Extra Paint
No need to save a big can of paint to store just the little that's left over. Use a glass jar or pint size paint can to store excess paint. Remove the paint can label or mark the new, smaller container with important information. Include the date the paint was used, the color name and number, where it was purchased, the room where it was used, and where (wall, trim, etc.) If you have it, attach the paint swatch from the paint store.


Be Ready for Touch Ups
Use small baby food jars or food storage containers to store small amounts of paint for touching up scratches or dents. Fill them with leftover paint, label where the paint was used (kitchen cabinets, master bedroom ceiling, etc.) and what type of paint it is (latex flat, oil eggshell, etc.), and place the containers in sealing plastic bags. When you need to make a small repair, shake the container well and dab on a spot of paint with a small foam brush or Q-tip.

On your next inside painting project, religiously follow these simple rules and I guarantee that you will save at least 2 hours. Here we go!


1. Slosh Your Brush
Before painting, slosh your brush in whatever solvent you will be using at the end of the day to clean the brush (i.e., water for latex, mineral spirits for oil, etc.) It'll be easier to clean when you're done.


2. Wrap Brush or Roller
If you don't feel like cleaning your brush or roller at the end of the day and expect to get back to painting within a few days--wrap the brush or roller tightly in a plastic bag and put in the freezer.


3. Latex Gloves or Lotion, Your Pick
Latex gloves are great for keeping your hands clean (especially if you're using oil-based paint!). If you can't stand latex gloves or are allergic, a thick application of hand lotion before painting will make cleaning a lot easier later on.


4. Wet Edge
Always keep a wet edge as you paint, and work away from that wet edge. If you paint over a dry edge, you will get overlap marks.


5. Avoid Cheap Roller Covers and Brushes
This one is important. Cheap roller covers leave fuzz on the wall. Cheap brushes leave streaky brush marks. Avoid those multi-packs of rollers, ten for a dollar. Pay the extra few cents and get better tools. It'll be worth it. Honest it will.


6. Test for Loose Paint
Will the existing painted surface take new paint? And hold it for years to come? Test this out by adhering a strip of duct tape to the existing painted surface and...ripping it away. If flakes of paint more than microscopic size come off, you may need to scrape and sand.


7. Low-Stick Masking Tape
Also known as "blue tape," this tape comes off easier and doesn't peel off primer or existing paint. Blue tape, by itself, will save you at least an hour of frustration over the old-style beige masking tape.


8. Rein in Your Paint Can Opener
Paint can openers, those little metal keys (you do use one, don't you?) are notorious for getting lost in the shuffle. Chain it to a small chunk of wood just like a public bathroom key. Whatever you do, just don't lose it!


9. Painting Process
Paint in this order:


Ceiling


Walls


Trim


Cabinets


Doors


And remember to always paint from top-down!

For more information, please visit our website:

http://www.dutchtouchpaintingservice.com/


Thursday, March 18, 2010

Mailbox Installation and Postal Regualtions 101

How To Repair or Replace A Damaged Mailbox Post
Rain... sleet... gloom of night... no matter what the time or weather, one day your mailbox or post will require replacement.


Thank you, snow plow... with an assist from the carpenter ants and termites!

The hardest part of a mailbox installation can be removing the old box or post! So I'm going to make the assumption that you wish to replace the box and the post. If I'm wrong, and you want to do just the box, I will have even less to tell you, but, if you scan down past the sweaty, smelly, earthwormy stuff, you may still pick up a few tips. I don't exactly know where this tale is going, so follow along as best you can, and hopefully we'll arrive at the end together!


Removing the old post... pray there's no cement!


Sorry... I can't make this easy! Wiggle it, pray for no cement, and pull like heck!! Then again, if you are pretty sure there is no cement, there is a strategy that can work, especially if you have a broken post with only a few inches exposed. Nail or screw a piece of 2x4 or larger lumber to the post at or within a few inches of ground level. Then, using a big pry bar or the mason's bar, pry the post straight up, using another board, toolbox, or significant other as a fulcrum.

Caution: don't use a significant other as a fulcrum... if you expect your relationship to move to a higher level!!


A post set in concrete creates a whole new problem. If I found one of those foundation-like clumps of rocks and gravel mix when the digging started, my first choice was always to choose a new location for the box!

Occasionally, there just isn't an option and the cement must be removed or moved. Yes... moved. Sometimes, it's easier to dig the hole a little wider and muscle the ball of concrete aside. Install the new post next to it.


US Postal regulations regarding mailbox location and height
In order for the safe and efficient delivery of mail, the US Postal Service has issued regulations regarding curbside deliveries. However, the local post office has the final say in mailbox placement. The "old guidelines were:


Vertical height from road surface to bottom of mailbox: Between 41" and 45".


Distance from outside edge of curb or edge of road surface to front of mailbox : 6-8"


This requirement dates back to February of 2001. However, the more recent requirements (12/9/2004) are less specific and do not refer to specifics of height and location. Instead, they require the post to be approved by the local post office and 2) accessible from the vehicle for curbside delivery such that the carrier does not have to leave his vehicle. That means that any obstruction, including parked cars, snow piles, etc. , give the carrier the option of withholding delivery until the obstruction is removed. (Click HERE for the last known location of these newer requirements.)


If you are installing a post with an extending arm, figure the position based the final position of the box, not just the arm! Note that the arm will need to be much higher up if you plan to hang the box. (More on mounting the box below.)


If you feel your situation is unique or would like an exception to the rules, talk to your postmaster or ask your friendly postal carrier for suggestions. (This is when that little bag of Christmas cookies or envelope makes all the difference!)


Creating your own mailbox? Be careful...
If you plan on making a mailbox yourself, you should check with the postmaster or letter carrier to get approval before you spend time and money on it! A poorly designed mailbox can halt your mail delivery!


Choosing your new mailbox post - wood or "other"?
Plastic
There are a number of choices for mailbox posts. The most recent addition is molded plastic. Some make no pretence about being plastic, using flowing shapes, interesting colors and unique designs with integrated features such as newspaper holders. Others are made to look like painted cedar mailbox posts but for a fraction of the price and without the durability problems. As a whole, plastic mailbox posts are extremely durable and will outlast any wood or metal post.


Aluminum and galvanized steel
Metal posts are available in galvanized steel and aluminum. Both are durable, but the nod goes to aluminum. Because it doesn't rust like steel, the finish stays looking good longer. However, aluminum posts tend to be more expensive.


Wood
Wood mailbox posts are the traditional choice, especially for do-it-yourselfers looking for economy. The cheapest and simplest post is a simple 4x4 or 6x6 post of any wood variety. A 3/4" - 1" thick pine, plywood or cedar wood base is attached to the top of the post and the mailbox is screwed onto it. The base should be sized to fit into the recess under the mailbox. On many boxes, you will need to leave some space at the door end of the base to prevent rubbing. Test the operation of the door before making the final box installation.

If you have more money to spend or want a more interesting look, you can buy a fancy-schmancy wood posts with a horizontal arm, complex supports and other ornamentation (or you can build one yourself). These are available in redwood, cedar and various untreated and pressure-treated woods.


Each type of wood has its advantages and disadvantages:
• Cedar and redwood are both very insect resistant, but are quite expensive and will eventually rot if buried. For the maximum "bang for the buck", they require an underground preservative (see next section for details) applied right to ground level.


• Untreated woods such as Douglas fir and pine can be used for mailbox posts but require preservatives both above and below-grade. They have the shortest lifespan of any post, regardless of the preservative used since they have no inherent resistance to insects or rot.

• Pressure-treated wood has high resistance to rot and insects due to the infusion of a powerful preservative and will last longer underground than any other wood product. However, pressure-treated wood does need to be coated with a protectant above ground or may crack, twist and split rather dramatically!


• Masonry mailbox posts or enclosure of granite, concrete, stone and brick must conform to both local or state code as well as postal requirements. Though the postal service is silent on the post's material, "rigid structures" at the curbside of busy roads may be considered a "safety hazard" by your state or town, so check with them before building one. (A customer of mine built a large brick mailbox enclosure on a main state road without consulting anyone. In the end, she had to pay for construction and destruction of that structure when the state ordered her to remove it. Let the builder beware!)


Prepare your mailbox post for burial with the correct underground preservative
There was a time when this was a no-brainer. My father used to put good ol' creosote on everything, except for my mother's tulip bulbs. (Or did he?) It rivaled his use of Mobil red and blue paint! Anyway, it went without saying that the old timers expected the wood to rot, so they prepared for it with crosote... the only available solution.


Today, most wooden fence and mailbox posts are made from either pressure-treated wood or cedar. Somehow, in popular thought, cedar has been compared to pressure-treated wood for rot resistance. Nothing could be further from the truth. CEDAR WILL ROT!! I have replaced untreated cedar mailbox posts less than 5 years old, cedar lamp posts less than 3 years old that were totally rotten, full of ants and all sorts of other awful creepy wormy things. In my neck of the woods, a fine 6x6 cedar mailbox post costs well over $200.00 installed. Expensive ant food, if you ask me!


Pressure-treated mailbox posts do not rot under most circumstances. (I've never seen it happen in 30 years of installations.) They are more likely to die from snow plow or garbage truck injuries! However, I have heard rumors that, under some unusual conditions of extreme moisture, they may rot after many years. So if you have some underground rated preservative around, slap some on that pressure treated post. Otherwise I wouldn't lose any sleep over it!


What type of preservative should be used underground on my post?
Good old creosote, a staple wood preservative for generations of do-it-yourselfers, has become extinct... joining the dodo bird, 30¢ cigarettes and the $1.00 gallon of gas! However, there are still quality underground preservatives available. A brand I have used for decades is Termin-8 by Jasco. Its dark-green color means you won't mistake it for a wimpy deck sealer! Termin-8 is oil-based and can be painted after 2-7 days when thoroughly dry.


Another, somewhat newer product that works quite well is Woodlife Creocoat from Wolman. Unlike Termin-8, Woodlife is water-based and is not designed to be overcoated.


Since the end of your post is most vulnerable to water damage, pour some of the preservative in a small pail and set the post into it to soak as long as you can... overnight if possible. Cut off a few inches from the end of the post immediately before to soaking it for the best results. Of course, you should also coat the rest of the post right up to ground level for the best results.

DO NOT install a mailbox post in cement unless absolutely necessary!


Or a fence post, for that matter! Think about it. 160 pounds of rock-hard concrete mix, buried 18" into the ground, in the only place the mailman can reach from his truck. Tough luck! So, using the secrets of the Pyramids, you manage to get this now useless clump of lime, gravel, and sand up to ground level. As you marvel at your improvisational skills, there is a lesson to be learned here, and it doesn't only apply to mailbox posts.


If you think that you may have to redo a job again sometime in the near future, design your repair so that the next time it will be easier... not harder! After all, do you really think a couple of hundred pounds of cement means as much to a moving vehicle (or the the carpenter ants) than it does to your poor overworked back? Hmmm?


NOTE: If you are installing one of those fancy ornamental iron posts, which generally don't stand upright very well in soil despite what it says on the box, you can use cement... but just enough to stabilize the post, not enough to anchor the Queen Mary!


Digging the hole the easy way... but not too deep!
I was joking. There isn't an easy way. But we're not quitters, right? Buy or rent a post hole digger so you disturb the minimum amount of soil. The hole should be no more than 18-24" deep. You do not have to bury the post down below the frost line! We're talking mailbox post here, not a house's foundation!


If you have particularly rocky soil (I love New England), you may need a long mason's bar, a rounded heavy steel bar from 4' to 6' long, flattened to a wedge-shape on one end. This can be used to pry out rocks and the flattened butt end can be used for tamping.


On the graphic of the post hole digger (left), notice the black lines on the handles. They are improvised depth indicators... far better than dirtying up your tape measure! If you rent one and it's not already marked, apply pieces of black electrical tape at your desired depth.


Add gravel, level the mailbox post and fill the hole in steps...
It's recommended to put a 4-6 inches of gravel in the bottom of the hole to improve drainage and to keep water from pooling at the bottom of the post. My judgment is that it may not be a bad idea for cedar posts, but for pressure-treated wood it is optional. If you don't have a bag of gravel handy (or prefer not to steal it from elsewhere in your yard), a bunch of small stones will do as a substitute.


To keep the mailbox post vertically level, I found a nifty little device that straps right onto the mailbox post. However, an ordinary level will do fine, too. Check the level every time you tamp down the dirt. You don't want your mailbox to become another "leaning" tourist attraction! Don't put the level on the top of the post... the top might not be square! Always check the level from the side.


Some people screw or clamp boards to the post to hold it upright. You can also wedge a few rocks around the post in the hole for temporary support. Or just hold the new post fairly level as you begin filling, making minor corrections as you fill. (A helper wouldn't hurt, either, if one is available to share the joy!)


Filling the hole around the post should be done in steps, packing or "tamping" down the soil as you fill around the post, 6-12" at a time. If you wait until the hole is full before packing, the post may always be loose. You can use most anything that will fit into the hole to pack the soil... a shovel handle, the but end of your masons bar, 2x4, etc. Keep checking that level!!


Installing your mail box on the post
If you wish to mount your box directly atop the pole or onto the top of an extended arm, you will use method (1). If you want to hang the box beneath the extended arm, use method (2).


Whichever way you choose, don't ever nail the mailbox to it's support... use galvanized or stainless-steel screws. If your mailbox does not outlive your post, you want it to be easy to remove. I have found galvanized square-drive decking screws to be a great choice.


(1) Mount a board directly on the mailbox post or on the arm extending from the post


If you don't have a board for the post, you must cut a piece of ¾" plywood or pine that will fit into the base of the mailbox. It should be a tight fit widthwise so the box doesn't bend when you screw it on, and short enough in length so the box door doesn't hit the board when the door opens. Position the board as you like it on the post or arm and secure it with at least 4 wood screws. I personally use #8 or #10 galvanized square drive screws, 2½" -3" long. If you are using a post with an arm, you may want to let the board overhang the end of arm for clearance of the door.


(2) Hanging the mailbox under an arm extending from the post


You can purchase a special set of bolts designed for hanging a mailbox at most hardware or home stores. The hardware consists of an eye bolt and an screw eye, interlocked and ready to use. The eye bolt is screwed into the underside of the post arm and the bolt is attached to the top of the mailbox. It may or may not come with a rubber washer to seal the outside of the hole.


If your hardware store doesn't carry these parts, you can either (1) use an eye bolt on the mailbox and a hook on the post arm, or (2) use an eye bolt and screw eye of the same size and bend either open to allow you to hook them together... then bend them closed. For each eye bolt, you should get two nuts, one for inside and one for outside the box, and a small rubber washer (a faucet washer will do) slightly larger than the nut, for the outside to prevent leaks.


Determine the location of the eye bolts on the box first. Some mailboxes have indentations or raised areas to indicate the suggested location for the eyebolts. Locate and drill the holes in the mailbox. Hold the box up under the arm in the position you want it, and use a pencil to transfer the location of the front-most hole you just made to the underside of the arm, being sure to center it along the width. Measure between the holes on the mailbox, and use this measurement to locate the second hole on the arm. Predrill both holes and install the screw eyes.


Put one nut on each eye bolt, and then push on the rubber washers. Bore out the centers of the washers with a drill if they are too tight for the bolts. Then put the eye bolts through the holes in the mailbox and secure them with the remaining nuts, tightening securely.


NOTE: You can use a dab of caulk instead of a rubber washer. The washer, however, will probably last longer.

Last but not least... mailbox numbers and other interesting facts
•The post office requires your street address number on the side of the box or post facing your approaching mailman. This is required even if you have your number on your home.


• If your box location is on another street (for example, if your home is on a corner), regulations require that both the house number and street name be on the box or post.


• You do not have to put your name on the mailbox unless you want to.


• Placing offensive graphics, caricatures or effigies intended to ridicule or disparage an individual or group of people is prohibited. People, huh. I guess the cats and cows haven't started complaining yet!


• Advertising on mailboxes is also prohibited.


Again, this regulation can be waived by your local postmaster for the appropriate consideration. (Only kidding!) So it goes.

For more information, please visit our website:

http://www.dutchtouchhandyman.com/


Tuesday, March 16, 2010

It's time to go CAT Sailing! 12 TIPS for SAFE Catamaran Sailing

It's time to go sailing!

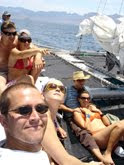
The foul weather is gone and today is the 1st great sunny warm day of the year. Now is the time to go outside.  Call Oceanside Sailing at 760-804-5788. We are located at Oceanside Harbor. Experience the thrill of wind-fueled travel on a large 36ft Catamaran, that accommodates up to 6 passengers. Actively learn to sail the boat with us, or simply put your feet up, loosen your shoulders and enjoy the ocean's breeze. All tours include snacks, water, sodas, friendly smiles and local marine life!

SAFE SAILING IS IMPORTANT!

Rest assured, your captain and crew know Oceanside Harbor and will make sure that you have a safe sailing adventure. For those of you that are planning to sail yourselves, please read the 12 safety tips below if you have never sailed before or you are a novice sailor.

12 Critical Catamaran Safety Tips:

1. Know your boat. Fully understand what each and every control line does and how to effectively sail the boat. When an emergency occurs and you need to think fast, you won't have the time to think, "now what does this line do?"
2. Make sure your mast is sealed. Take it down to your local lake and drop it into shallow water. If it leaks - SEAL IT! Trying to right a knocked over catamaran with water in the mast is next to impossible. When it fills up with enough water, the boat will turtle. And then you've got a FUN time on your hands!


3. Learn the properties of sailing your boat. Learn to steer by the sails alone. Get the feeling of tacking and jybing. Learn to feel how your boat behaves relative to the crew position aboard. Understand how flattening the sails de-powers the boat. Practice flying a hull. Practice going out on the wire. DO MOB DRILLS! Or in this case HOT drills (Hat OverBoard). Since your boat has no engine, you need to learn how to quickly turn around a retrieve an overboard object or person! It's more important on a non-engined beach cat than any other kind of boat!


4. PURPOSELY FLIP YOUR BOAT! It'll happen sooner or later, so you might as well be prepared for it. Getting knocked down isn't a bad thing. It's all part of the cat-sailing experience! Have a friend with a powerboat shadow you and a crewman (in case you need assistance). Knock her over and right her several times. Get the feeling for going over and righting it. This way, you'll never be surprised when it happens.

If your catamaran is prone to pitchpoling such as the Hobie-16 (be extremely careful with this next maneuver) you should get the feel for what it's like one or two times. With you and your crew as far foward as possible, sail into as large a wake as your friend's powerboat can produce and try to pitchpole forward. It's gonna happen, so learn how it feels and how to avoid it. (Bascally - as wind strength increases, get all aboard AFT! Get the weight as far back as possible and keep those bows up! If you feel that you need a little extra security, you can buy some anti-pitchpole fins for the bows. They're not legal for racing, but they are somewhat effective in preventing pitchpoles. You can get them from murrays.com for $82 part no. 01-3240.)


5. Before taking anyone aboard, instruct them on emergency procedures in case you go overboard. Everyone should know the two steps for stopping the boat: How to uncleat the sheets and then steer the boat into the wind.
6. ALWAYS WEAR YOUR PFD when the sailing is getting wild! By law, we must have the Portable Floating Devices aboard. What we do is have them nearby. But when you are a novice, be safe!! Common sense tells you when the weather turns stormy, put your PDF ON!

 7. Carry an airhorn aboard that you can quickly grab if some idiot in powerboat doesn't see you. Maybe he'll hear you and you can avoid a collision.

8. Get yourself a pair of Sea-Snips. They're basically EMT scissors in a velcro sheath. Attach it to your PFD strap. One of the most dangerous things in sailing any boat with a trapeze system (cats, 49'ers, Aussie 18's, etc) is getting your harness hook caught up in a line when the boat flips and trapping you under water. It's very rare that it happens (one in a million chance) but if it does, your PFD won't save you. You'll be caught and you'll need a way to cut yourself or crewman free. Knives require two hands, you can drop them, and they may not cut steel cable. A pair of Sea-Snips stays in your fingers, only requires one hand, and they chop anything in half that can fit in their jaws! They're inexpensive too, like $15!

9. If you plan to sail far from shore, always carry a handheld, submersible, VHF radio. If you are out on a lake alone with no other boats who can render assistance, carry a VHF radio. If you are soloing, carry a VHF radio. As you can see, I believe in the investment in a submersible VHF radio as a piece of safety equipment.

10. When in doubt - sail another day. You've got yourself one of the most fun sailboats every designed! Beach cats are great! But that's exactly what they are, BEACH cats. You're not going to be crossing oceans. If the winds look like they'll overpower your little boat (easily done), just sail another day. There's always another day. When the sailing becomes more work than fun - why do it? It should be fun and exciting, not stressful and worrisome.  

11. Always carry some critical spare parts and materials with you such as duct tape, nylon zip-ties, pins, rings, rudder pin, spare line, etc. and the basic tools necessary to make basic repairs. One of the most frustration things has been to lose a rudder crossbar connecting bolt while sailing. All of a sudden, one or both rudders becomes totally unusable with no way to fix it or steer the boat other than sitting on the transom and holding onto the gudgeon itself. That sucks! 

 12. Before you step your mast, LOOK OUT FOR POWER LINES! Before dropping your mast, LOOK OUT FOR POWER LINES! When moving the boat with the mast up, LOOK OUT FOR POWER LINES! Oh yeah ALWAYS LOOK OUT FOR POWER LINES! Without a doubt, the most dangerous part of cat sailing! You would think that a boat ramp wouldn't have overhead lines around it... Nooooooo! You would be amazed as to how common this is!


Extra Tip: You betcha you can take the kids aboard. Just take it nice and easy and gradually work them into flying hulls. None at first and then add a little bit each time. DO NOT TETHER them down. If a kid goes overboard, do your MOB drill and pick them up quickly (you have been practicing, haven't you?) But if you flip, you don't want anyone tethered because they could get "teabagged" which could cause injury.

 Extra Tip: Make sure you carry fresh water bottles aboard with you. Catamaran sailing is fast and exciting, but you will get thirsty sailing under the sun. Get a bottle in an insulated pouch with a strap and secure it to the trampoline so you can easily get at it. And finally... sunblock, sunblock, SUNBLOCK!
You can never have enough sunblock!


Hope these help you out! Have fun with your new catamaran.

For more information, please visit our website:

http://www.oceansidesailing.com/


Thursday, March 11, 2010

Bathroom Cleaning Tips 101

Bathroom Cleaning Tips

Helpful Hints

Always keep an all-purpose cleaner and a sponge in the guest bath so you can sneak away and clean up when unexpected company shows up.
Keep a squeegee in the shower so everyone can wipe it down when they are done (this will help prevent mildew).
Steam helps to loosen build-up so why not clean while you're in there?
Disinfectant can be used on everything in the bath except the mirror.
Don't forget doorknobs and switchplates.


Cleaning Shower Mats
 Dip a stiff brush in a kerosene and warm water solution to clean bath and shower mats.
 Easy Bathroom Cleaning
 Clean after a steamy bath or shower. The walls, fixtures, etc., will be much easier to clean because the steam will have loosened the dirt.

For dark stains (like rust) rub with a paste of borax and lemon juice.

Once a month, pour one cup of baking soda, followed by one cup of white vinegar down the drain. Wait an hour and flush with warm water. The combination fizzles away most of the buildup. Works for shower, tub and kitchen sink drains as well.Cleaning the Sink


Bathtub Rings
To avoid bathtub rings, don't use oily bath preparations. Use a water softener if you live in a hard-water area. Rinse the tub immediately after bathing.

 If a ring does form, wipe it off with undiluted ammonia (wear rubber gloves) or a wet sponge generously sprinkled with baking soda. Rinse clean and wipe dry. For a more stubborn stain, scour with automatic dishwashing detergent or rub with a cloth dipped in vinegar.

Cleaning with Rubbing Alcohol

Rubbing alcohol will clean the caulking around bathtubs. It also shines chrome and glass. Liquid chlorine bleach (1/4 cup to one gallon) will also clean caulk.

Cleaning Toilet Bowl
Clean the toilet bowl while you're away by pouring in 1/4 cup bleach and leaving it until you return.

Keep the toilet bowl ring-free by pouring a half-gallon of white vinegar in it once a month. Let it soak overnight before flushing.

Don't use bleach if you're already using a tank-held cleaner that's released when the toilet is flushed. The two may react chemically.

To avoid clogging and odors, pour one cup baking soda down the bowl weekly.

Ring around your toilet? Again, alkaline deposits cause those nasty rings. Depending on the hardness of your water, pour one or two cups of white vinegar into the toilet once a month to eliminate the problem.

Toilet bowl rings - Here I take a deep breath and plead with you to follow these instructions. Repeat. Follow these instructions. Do not deviate or you will scratch the inside of your toilet bowl.

Turn off the water flow to the toilet and flush to remove the water. Saturate a couple of heavy duty paper towels with white vinegar or the Orange Citrus Cleaner. Place around the edges making sure all areas are covered. Keep the towels damp for several hours, even overnight, until the water spots start dissolving. Then scrub with a stiff nylon brush.

If the white vinegar does not dissolve the whole ring, go to a janitorial supply store or a hardware store and purchase a pumice stone and a stiff toothbrush. Dampen one end of the pumice stone and keep it wet.


Gently, very gently, rub the pumice stone across the lines. When enough pumice builds on the sides, switch to a stiff bristle brush to continue working. Rub gently until the deposit disappears. Pumice will scratch the toilet. Use it only one time and cautiously.

Getting to Dirt in the Corner
Can't get to that dirt in the corner? Make a pointed tool by cutting an old whisk broom at a 45 degree angle.

If you have a small bathroom or a tile entrance and don't have time to bother with a scrub bucket, just use an all purpose spray cleaner and a damp sponge for quick clean up.

How To Get Rid Of Mildew In Your Bathroom
 To remove mildew from the corners of the tub, dip cotton balls in bleach and let them sit, when you finish cleaning the bath, remove cotton and rinse well. The mildew will be gone.

Don't let mildew grow in the corners of your bathroom! See VideoJug's top tips on how to get rid of mould and leave your bathroom sparkling clean

Step 1:
You will need:

• rubber gloves
• cream cleaner
• a metal scourer
• a household sponge
• an old toothbrush
• a tub or bucket
• and a cloth


Step 2: Prepare

Fill a tub with hot water and place it by the shower. Use the soft side of a household sponge to dampen down any areas afflicted with mildew.

 
Step 3: Scrub

Squirt a generous amount of cream cleaner onto the abrasive side of a house hold sponge. Then get scrubbing. Jacqueline recommends a cream cleaner as it clings to the effected areas, making it easier to remove the stains. Unfortunately there is no quick fix for mildew, it's all down to elbow grease. If the mildew is very bad switch to a metal scourer, this is more abrasive so will require less scrubbing.

Squirt on more cream cleaner and keep scrubbing until the mildew starts to lift.

Use an old toothbrush for the hard to reach areas. Again squirt on the cream cleaner and get scrubbing.


Step 4: Rinse
Once the mildew has started to lift wipe down with a cloth. If the area still looks heavily stained scrub again. Keep going until you are happy with the result.

Keep ahead of mildew so it doesn't become a problem. Every six months spray your bathroom ceiling with a 50/50 solution of hydrogen peroxide and water. Peroxide is a safe bleach and won't harm the environment or your lungs. Find larger quantities of peroxide at beauty or medical supply stores.

Spray the mixture on and leave it. No need to rinse or scrub. If you currently have mildew, follow the above directions. Wait two hours and respray. Then wait 24 hours and spray a third time if necessary.
Disinfectant

Clean with a disinfectant to kill germs. Everything in the bathroom except the mirror can be cleaned this way in just 3 or 4 minutes a day. Keep cleaners in bath for a quick job when unexpected company drops by.

Shower Tile
Remove soap and hard water buildup on shower tile with tile cleaner. Then apply a good paste wax and buff with a dry cloth to deter future water spots.

Air Freshener

For immediate air freshener in the bath, place a fabric softener sheet in the wastepaper basket or add a dab of fragrance on a light bulb. When the light is on, the heat releases the aroma.

Freshen Drain

To freshen drain, pour 1/4 to 1/2 box of baking soda down the drain, add 1/2 cup of white vinegar. Cover drain tightly for a few minutes and flush with cold water.


Shower Doors
Rub glass shower doors with a white vinegar-dampened sponge to remove soap residue.

To clean shower track door, pour full strength vinegar into the track, let soak for a few minutes, then rinse.

A coat of acrylic floor finish gives new shine to fiberglass shower doors and makes water spots disappear. Club soda will give new shine to your counter tops.

Alkaline deposits in the water cause those not so pretty spots on your glass doors and shower walls. Apply a car wax to the walls and doors, but not the floor or it gets real slick. Both fiberglass and glass are porous. The car wax seals those pores, which makes cleaning easier and keeps water spots away. Reapply twice yearly.

Squeegee or wipe down your shower after each use to further prevent buildup. If you're tired of fighting the soap scum buildup, switch to liquid soap, natural soap or Dove. It's the talc in most bar soaps that causes the buildup. Changing soap can eliminate the buildup. You still need to clean the shower once a week, but the job is easier.

Clean the showers once a week with an orange citrus based cleaner. Spray on and give it ten minutes to dissolve the dirt. Why do all that scrubbing when your product does it for you?
OK, so the soap scum refuses to budge and friends are coming for a visit. Use your orange based cleaner concentrated. Pour plenty on an old dishrag and wipe on the walls and doors. Use can use boiling hot white vinegar (wear gloves) but you must keep applying it as the white vinegar dries. It takes time to dissolve that buildup.


Patience now becomes a virtue. Wait and wait and wait some more. Go clean the rest of the house. If the cleaner starts dripping down the walls, wipe it back on. Check the walls with a fingernail. If the residue removes easily, round one is about over.

Use a white bristle pad to scrub. They look like fibers and are glued to a sponge. Use the white ones only. The colored scrubbers are coarser and do scratch. Test a spot to make sure it won't scratch the fiberglass. Dampen the pad, keeping it good and wet and gently scrub. This removes the soap buildup and most of the white mineral deposits on the glass doors. Nothing removes the etch marks themselves, but further damage is halted. Reapply the orange citrus cleaner if necessary.

Plastic shower curtains can be machine washed. Remove, spray with your diluted orange based cleaner and wait about 10 minutes. Wash with your rags and they come out quite clean. Air dry. If the curtain is long enough, cut off the seam at the bottom to prevent mildew buildup down there.


Cleaning Shower Curtains
Before hanging shower curtains, soak in salt water solutions to prevent mildew.

To remove mildew, wash in hot soapy water, rub with lemon juice and let the shower curtain dry in the sun.

 For plastic curtains, clean with laundry pre-wash spray. Spray along the top, letting it run down to cover the curtain. Allow it to sit for a few minutes, then rinse it off.


Faucets
Water deposits build up around faucets and drain areas. Use a paper towel soaked in white vinegar and place around the faucet. Plug the drain and pour 1/2 cup white vinegar in the sink and wait. It takes time for the white vinegar to dissolve the alkaline deposits. Scrub using a stiff bristled nylon toothbrush.

Do not use orange based or powdered cleansers on brass or gold plated faucets. These fixtures corrode and scratch quickly. Dry these faucets after each use to prevent water spot damage.

For more information, please visit our website:


http://www.dutchtouchmaids.com/